Setting Up Your Lab
This chapter guides you through setting up a safe and ready FreeBSD lab for driver development.
Setting Up Your Lab
Before we can begin writing code or exploring FreeBSD's internals, we need a place where it's safe to experiment, make mistakes, and learn. That place is your lab environment. In this chapter, we'll create the foundation you'll use throughout the rest of the book: a FreeBSD system configured for driver development.
Think of this chapter as preparing your workshop. Just as a carpenter needs the right bench, tools, and safety gear before building furniture, you need a reliable FreeBSD installation, the right development utilities, and a way to recover quickly when things go wrong. Kernel programming is powerful but unforgiving; a tiny mistake in your driver can crash the whole system. Having a dedicated lab means those crashes become part of the learning process, not disasters.
By the end of this chapter, you will:
- Understand the importance of isolating your experiments from your main computer.
- Choose between using a virtual machine or bare-metal installation.
- Install FreeBSD 14.3 step by step.
- Configure your system with the tools and source code needed for driver development.
- Learn how to take snapshots, manage backups, and use version control so your progress is never lost.
Along the way, we'll pause for hands-on labs so you don't just read about setting things up, you'll actually do it. When you finish, you'll have a FreeBSD lab that is safe, repeatable, and ready for everything we'll build together in the coming chapters.
Reader Guidance: How to Use This Chapter
This chapter is more practical than theoretical. Think of it as a step-by-step manual to prepare your workshop before you begin the real experiments. You'll be asked to make choices (virtual machine or bare metal), follow installation steps, and configure your FreeBSD system.
The best way to use this chapter is to do the steps as you read them. Don't just skim through, actually install FreeBSD, take the snapshots, write down your choices in your lab logbook, and try the exercises. Each section builds on the last, so by the end you'll have a complete environment that matches the examples in the rest of this book.
If you already know how to install and configure FreeBSD, you may skim or skip parts of this chapter, but don't skip the labs; they ensure your setup matches what we'll use throughout the book.
Above all, remember: mistakes here are not failures, they are part of the process. This is your safe place to experiment and learn.
Estimated time to complete this chapter: 1-2 hours, depending on your choice of virtual machine or bare-metal installation, and whether you already have experience installing operating systems.
Why a Lab Environment Matters
Before we start typing commands and writing our first pieces of code, we need to pause for a moment and think about where we are going to do all this work. Kernel programming and device driver development are not like writing a simple script or a web page. When you experiment with the kernel, you are experimenting with the heart of the operating system. A small mistake in your code can cause your machine to freeze, reboot unexpectedly, or even corrupt data if you're not careful.
This doesn't mean driver development is dangerous, it means we need to take precautions and set up a safe environment where mistakes are expected, recoverable, and even encouraged as part of the learning process. That environment is what we'll call your lab.
Think of your lab as your personal workshop. Just like a chemist wouldn't run an experiment on the family dining table without protective equipment, you shouldn't run unfinished kernel code on the same machine where you keep your personal photos, work documents, or important school projects. You need a space designed for exploration and failure, because failure is how you'll learn.
Why Not Use Your Main Computer?
It's tempting to think: "I already have a computer running FreeBSD (or Linux, or Windows), why not just use that?" The short answer: because your main computer is for productivity, not experiments. If you accidentally cause a kernel panic while testing your driver, you don't want to lose unsaved work, crash your network connection during an online meeting, or even damage a filesystem with corrupted data.
Your lab setup gives you freedom: you can break things, restart, and recover in minutes without stress. This freedom is essential for learning.
Virtual Machines: The Beginner's Best Friend
Most beginners (and even many experienced developers) start with virtual machines (VMs). A VM is like a sandboxed computer running inside your real computer. It acts just like a physical machine, but if something goes wrong, you can reset it, take a snapshot, or reinstall FreeBSD in minutes. You don't need a spare laptop or server to start developing drivers; your current computer can host your lab.
We'll dive deeper into virtualization in the next section, but here are the highlights:
- Safe experiments: If your driver crashes the kernel, only the VM goes down, not your host computer.
- Easy recovery: Snapshots let you save the VM's state and roll back instantly if you break something.
- Low cost: No need for dedicated hardware.
- Portable: You can move your VM between computers.
Bare Metal: When You Need the Real Thing
There are times when only real hardware will do, for example, if you want to develop a driver for a PCIe card or a USB device that requires direct access to the machine's bus. In those cases, testing in a VM might not be enough because not all virtualization solutions can pass through hardware reliably.
If you have an old spare PC, installing FreeBSD there can give you the closest-to-reality environment for testing. But remember: bare metal setups don't have the same safety net as VMs. If you crash the kernel, your machine will reboot, and you'll need to recover manually. That's why I recommend starting in a VM, even if you eventually move to bare metal for specific hardware projects.
Real-World Example
To make this more concrete: imagine you're writing a simple driver that mistakenly dereferences a NULL pointer (don't worry if that sounds technical now, you'll learn all about it later). On a VM, your system might freeze, but with a reset and a snapshot rollback, you're back in action within minutes. On bare metal, the same mistake could cause filesystem corruption, requiring a lengthy recovery process. That's why a safe lab environment is so valuable.
Hands-On Lab: Preparing Your Lab Mindset
Before we even install FreeBSD, let's do a simple exercise to get into the right mindset.
- Grab a notebook (physical or digital). This will be your lab logbook.
- Write down:
- Today's date
- The machine you're going to use for your FreeBSD lab (VM or physical)
- Why you chose that option (safety, convenience, access to real hardware, etc.)
- Make a first entry: "Lab setup started. Goal: build a safe environment for FreeBSD driver experiments."
This may feel unnecessary, but keeping a lab log will help you track your progress, repeat successful setups later, and debug when something goes wrong. In professional driver development, engineers keep very detailed notes; starting this habit now will make you think and work like a real systems developer.
Wrapping Up
We've introduced the idea of your lab environment and why it's so important for safe driver development. Whether you choose a virtual machine or a spare physical computer, the key is having a dedicated place where it's okay to make mistakes.
In the next section, we'll dive deeper into the pros and cons of virtual machines versus bare metal setups. By the end of that section, you'll know exactly which setup makes sense for you to begin your FreeBSD journey.
Choosing Your Setup: Virtual Machine or Bare Metal
Now that you understand why a dedicated lab environment is important, the next question is: where should you build it? FreeBSD can run in two main ways for your experiments:
- Inside a virtual machine (VM), running on top of your existing operating system.
- Directly on physical hardware (often called bare metal).
Both options work, and both are widely used in real-world FreeBSD development. The right choice depends on your goals, your hardware, and your comfort level. Let's compare them side by side.
Virtual Machines: Your Sandbox in a Box
A virtual machine is a piece of software that lets you run FreeBSD as if it were a separate computer, but inside your existing computer. Popular VM solutions include:
- VirtualBox (free and cross-platform, great for beginners).
- VMware Workstation / Fusion (commercial, polished, widely used).
- bhyve (FreeBSD's native hypervisor, ideal if you want to run FreeBSD on FreeBSD).
Why developers love VMs for kernel work:
- Snapshots save the day: Before trying risky code, you take a snapshot. If the system panics or breaks, you restore in seconds.
- Multiple labs on one machine: You can create several FreeBSD instances, each for a different project.
- Easy to share: You can export a VM image and share it with a teammate.
When to prefer VMs:
- You're just starting out and want the safest environment possible.
- You don't have spare hardware to dedicate.
- You expect to crash the kernel often while learning (and you will).
Bare Metal: The Real Deal
Running FreeBSD directly on hardware is as close as you can get to "the real thing". This means FreeBSD boots as the only operating system on the machine, talking directly to the CPU, memory, storage, and peripherals.
Advantages:
- True hardware testing: Essential when developing drivers for PCIe, USB, or other physical devices.
- Performance: No VM overhead. You get full access to your system's resources.
- Accuracy: Some bugs only appear on bare metal, especially timing-related issues.
Disadvantages:
- No safety net: If the kernel crashes, your whole machine goes down.
- Recovery takes time: If you corrupt the OS, you may need to reinstall FreeBSD.
- Dedicated hardware needed: You'll need a spare PC or laptop you can dedicate fully to experiments.
When to prefer bare metal:
- You plan to develop a driver for hardware that doesn't work well in VMs.
- You already have a spare machine you can dedicate entirely to FreeBSD.
- You want maximum realism, even if it means more risk.
Hybrid Strategy
Many professional developers use both. They do most of their experimentation and prototyping in a VM, where it's safe and fast, and only move to bare metal once their driver is stable enough to test against real hardware. You don't have to commit to one forever, you can start with a VM today and add a bare-metal machine later if you need it.
Quick Comparison Table
| Feature | Virtual Machine | Bare Metal |
|---|---|---|
| Safety | Very high (snapshots, rollback) | Low (manual recovery needed) |
| Performance | Slightly lower (overhead) | Full system performance |
| Hardware access | Limited / emulated devices | Full, real hardware |
| Setup difficulty | Easy and fast | Moderate (full install) |
| Cost | None (runs on your PC) | Requires dedicated machine |
| Best for | Beginners, safe learning | Advanced hardware testing |
Hands-On Lab: Deciding Your Path
- Look at your current resources. Do you have a spare laptop or desktop that you can dedicate to FreeBSD experiments?
- If yes -> Bare metal is an option for you.
- If no -> A VM is the perfect starting point.
- In your lab logbook, write down:
- Which option you will use (VM or bare metal).
- Why you chose it.
- Any limitations you expect (for example, "Using a VM, may not test USB passthrough yet").
- If you choose VM, note which hypervisor you'll use (VirtualBox, VMware, bhyve, etc).
This decision doesn't lock you in forever. You can always add a second environment later. The goal now is to start with a safe, reliable setup.
Wrapping Up
We've compared virtual machines and bare metal setups and seen the strengths and trade-offs of each. For most beginners, starting with a VM is the best balance of safety, convenience, and flexibility. If you later need to interact with real hardware, you can add a bare-metal system to your toolkit.
In the next section, we'll roll up our sleeves and perform the actual FreeBSD 14.3 installation, first in a VM, and then we'll cover the key points for bare-metal installs. This is where your lab truly begins to take shape.
Installing FreeBSD (VM and Bare Metal)
At this point, you've chosen whether to set up FreeBSD in a virtual machine or on bare metal. Now it's time to actually install the operating system that will serve as the foundation for all our experiments. We'll focus on FreeBSD 14.3, the latest stable release at the time of writing, so that everything you do matches the examples in this book.
FreeBSD's installer is text-based, but don't let that intimidate you, it's straightforward, and in less than 20 minutes you'll have a working system ready for development.
Downloading the FreeBSD ISO
- Visit the official FreeBSD download page: https://www.freebsd.org/where
- Choose the 14.3-RELEASE image.
- If you are installing in a VM, download the amd64 Disk1 ISO (
FreeBSD-14.3-RELEASE-amd64-disc1.iso). - If you're installing on real hardware, the same ISO works, though you might also consider the memstick image if you want to write it to a USB stick.
- If you are installing in a VM, download the amd64 Disk1 ISO (
Installing FreeBSD in VirtualBox (Step by Step)
If you don't already have VirtualBox installed, you'll need to set it up before creating your FreeBSD VM. VirtualBox is available for Windows, macOS, Linux, and even Solaris hosts. Download the latest version from the official website:
https://www.virtualbox.org/wiki/Downloads
Choose the package that matches your host operating system (for example, Windows hosts or macOS hosts), download it, and follow the installer. The installation is straightforward and only takes a few minutes. Once it's complete, launch VirtualBox, and you'll then be ready to create your first FreeBSD virtual machine.
Now that you are ready, let's go through the VirtualBox process, since that's the easiest entry point for most readers. The steps are similar in VMware or bhyve.
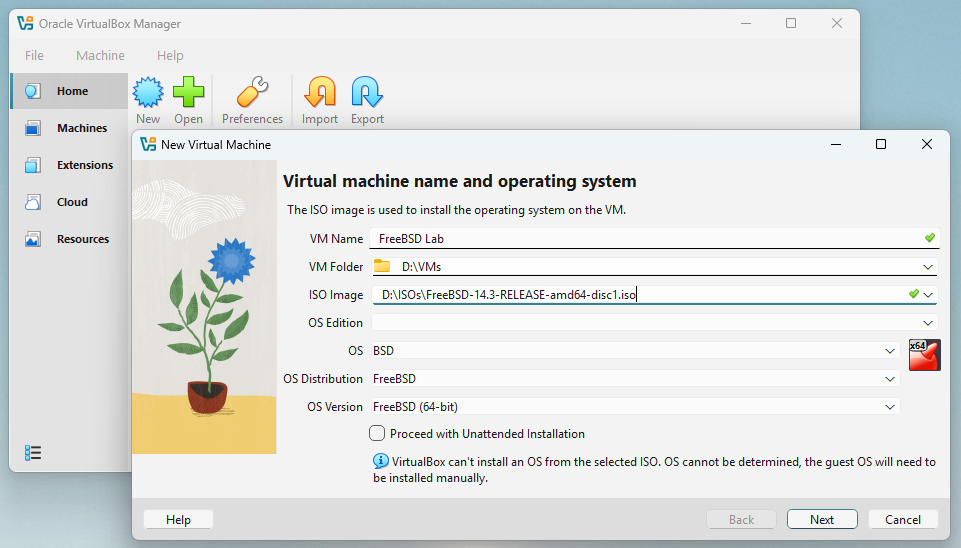
To get started execute VirtualBox App in your computer and in the main screen select Home in the left column, and than click in New, and follow the steps below:
-
Create a new VM in VirtualBox:
-
VM Name:
FreeBSD Lab -
VM Folder: Choose a directory to hold your FreeBSD VM
-
ISO Image: Choose the FreeBSD Iso file that you downloaded above
-
OS Edition: Leave in blank
-
OS: Choose
BSD -
OS Distribution: Choose
FreeBSD -
OS Version: Choose
FreeBSD (64-bit)Click in Next to continue
-
-
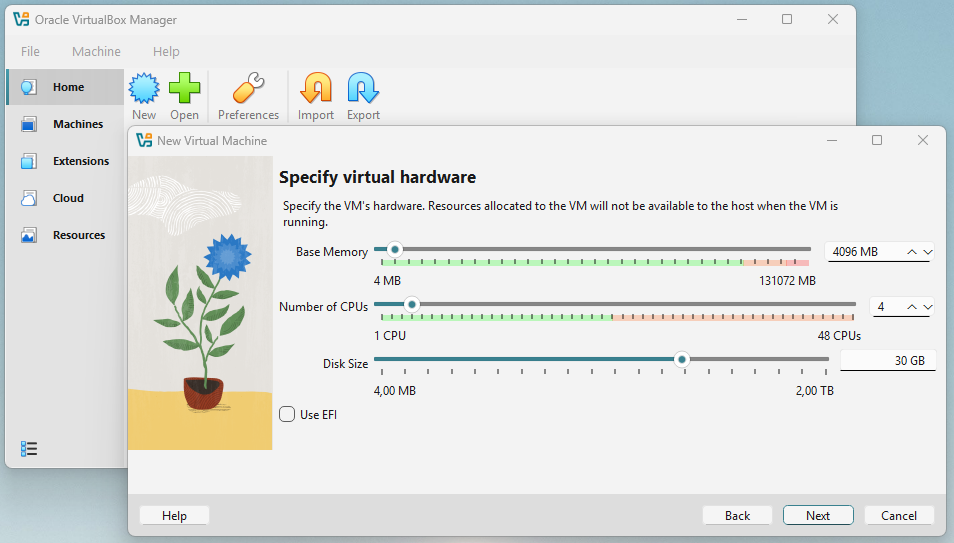
Allocate resources:
-
Base Memory: at least 2 GB (4 GB recommended).
-
Number of CPUs: 2 or more if available.
-
Disk Size: 30 GB or more.
Click in Next to continue
-
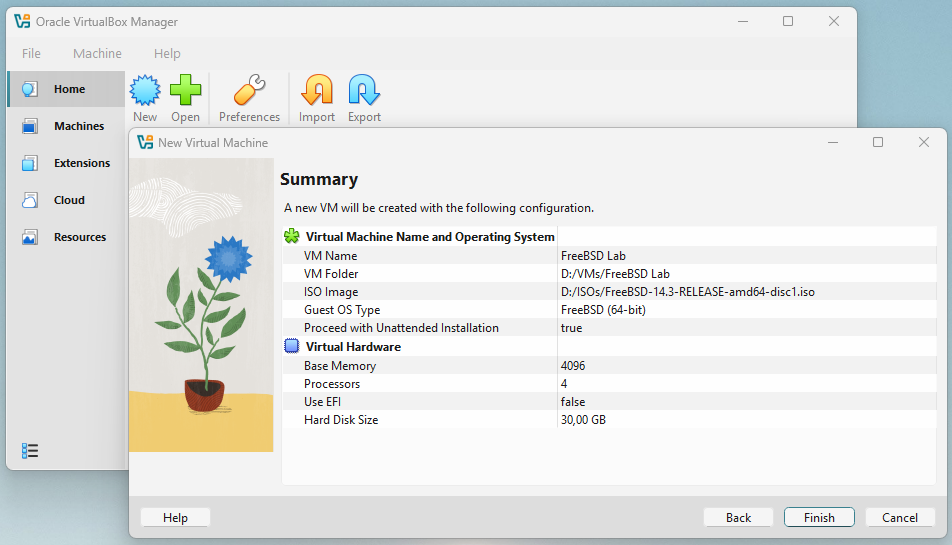
- Review your options: If you are happy with the summary, click in Finish to create the VM.
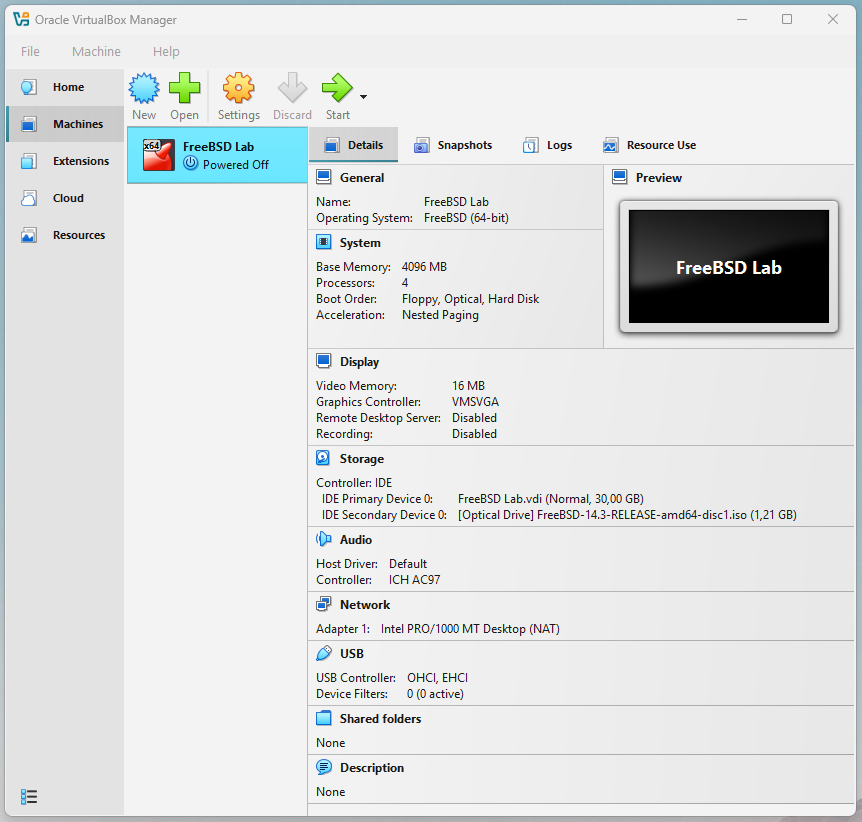
- Start the virtual machine: Click in the green Start button. When starting the VM, it will boot using the FreeBSD installation disk that you specified when creating it.
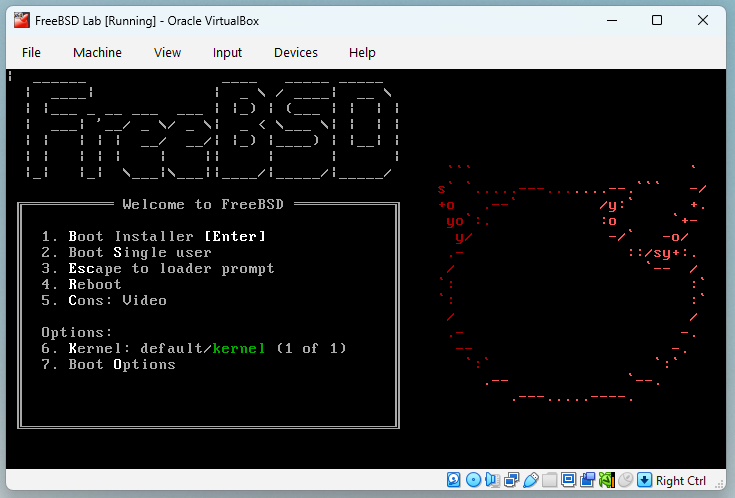
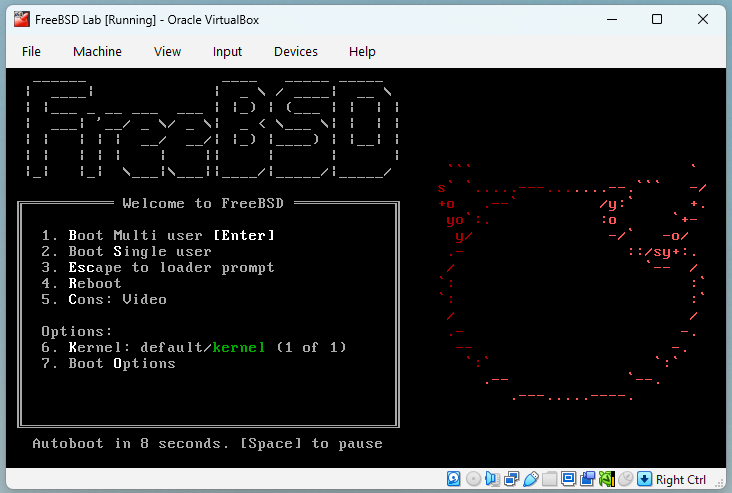
- Boot the VM: The VM will show the FreeBSD boot loader, press 1 to continue the boot into the FreeBSD.
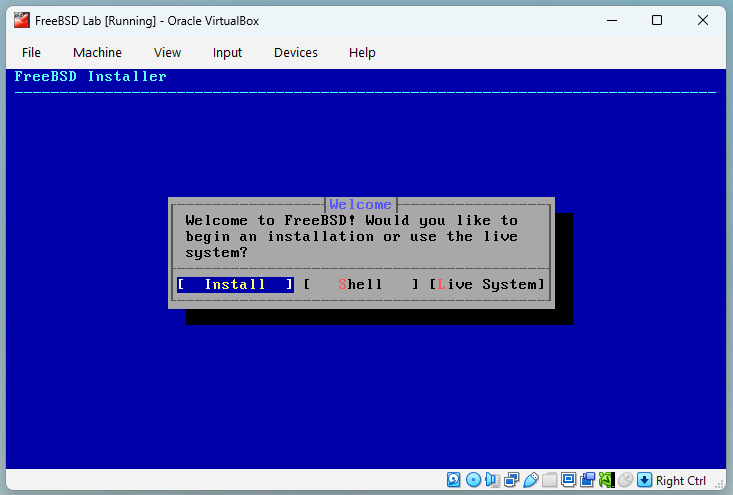
- Run the installer: The boot process, the installer will run automatically, choose [ Install ] to continue.
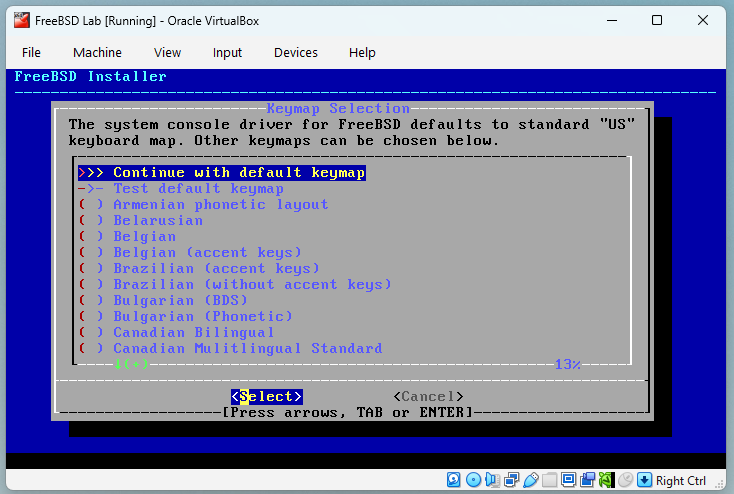
- Keyboard layout: Choose your preferred language/keyboard, the default is US layout. Press Enter to continue.
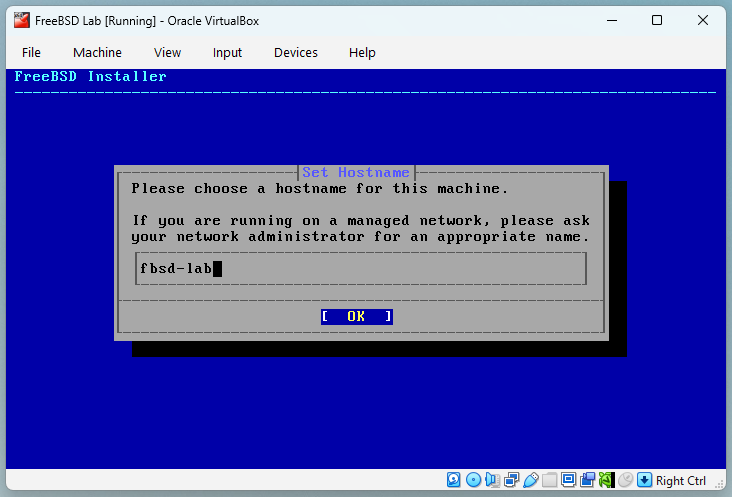
- Hostname: Type the hostname for your lab, in the example I choose
fbsd-lab. Press Enter to continue.
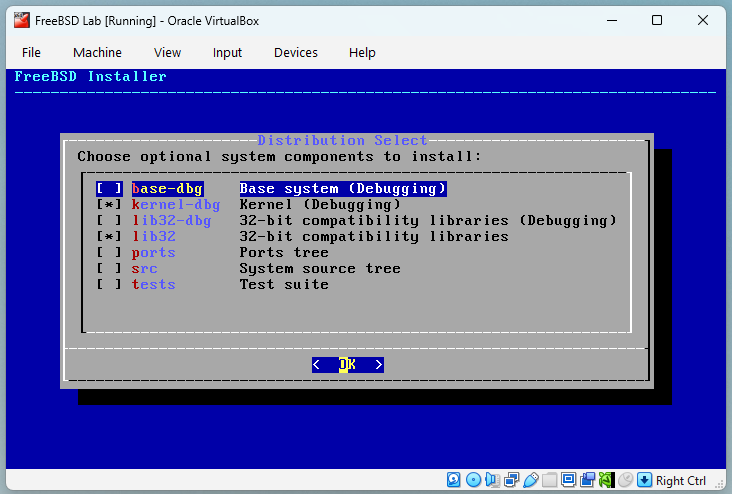
- Distribution Select: Leave defaults (base system, kernel). Press Enter to continue.
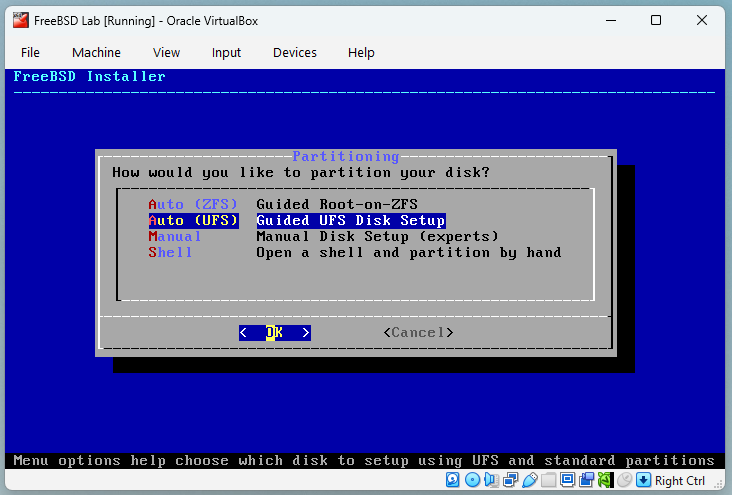
- Partitioning: Choose Auto (UFS) unless you want to learn ZFS later. Press Enter to continue.
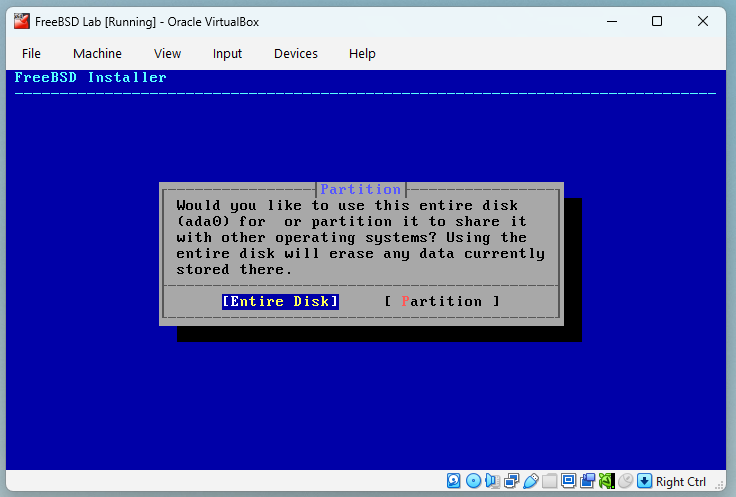
- Partition: Choose [ Entire Disk ]. Press Enter to continue.
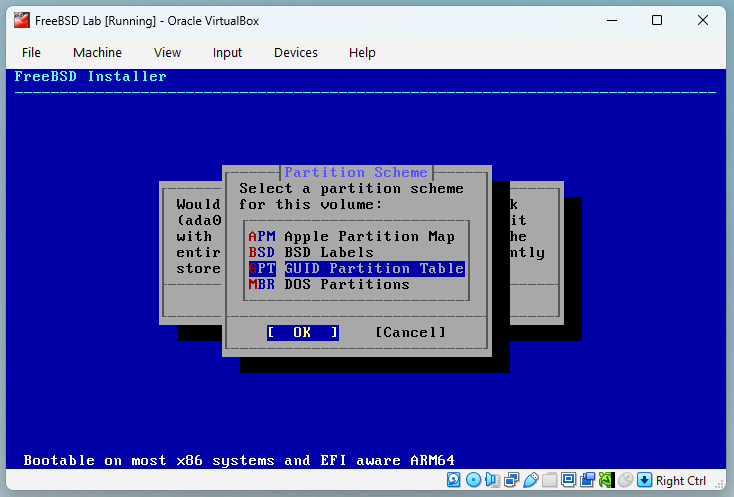
- Partition Scheme: Choose GPT GUID Partition Table. Press Enter to continue.
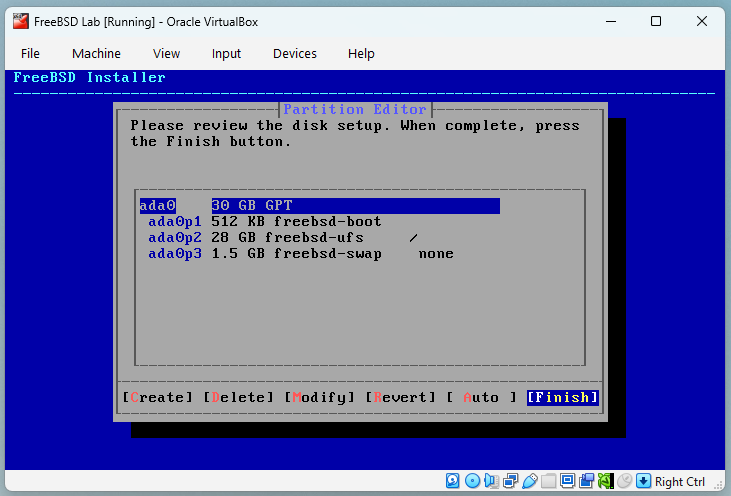
- Partition Editor: Accept the default, and choose [Finish]. Press Enter to continue.
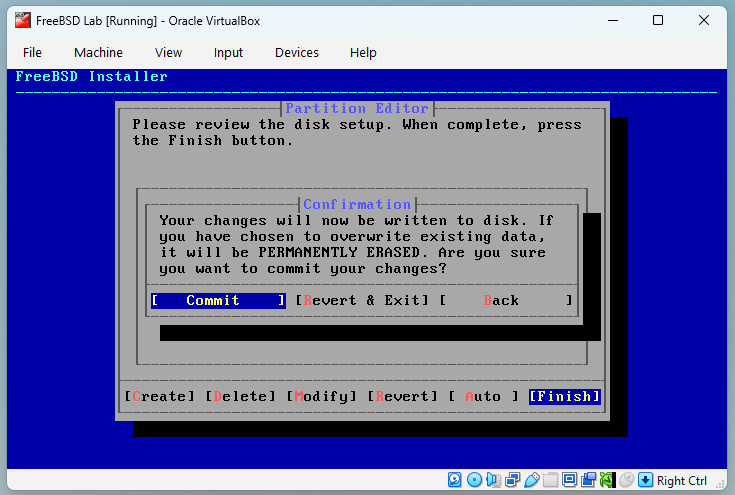
- Confirmation: In this screen you will confirm that you want to proceed with the FreeBSD Installation, after this confirmation the installer will start writing data to your hard disk. To proceed with the installation choose [Commit] and press Enter to continue.
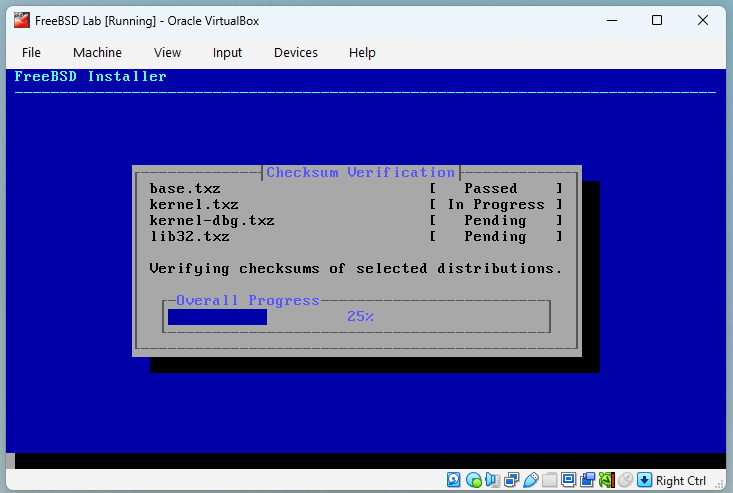
- Checksum Verification: At beginning of the process FreeBSD installer will check the integrity of the installation files.
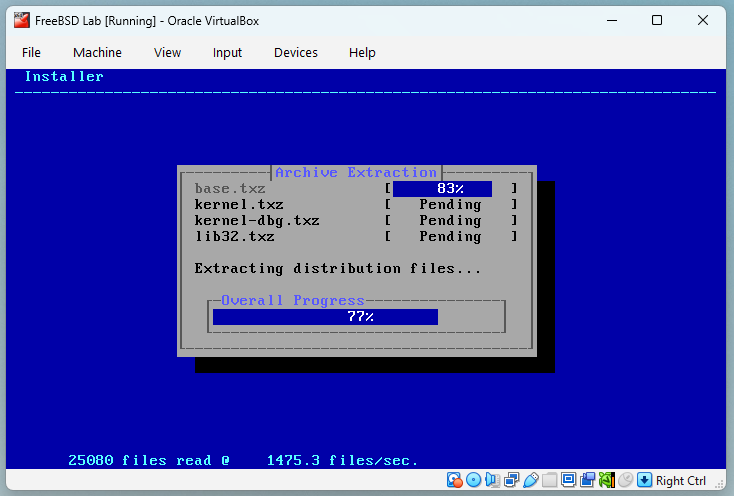
- Archive Extraction: After the files were validated, the installer will extract the files to your hard disk
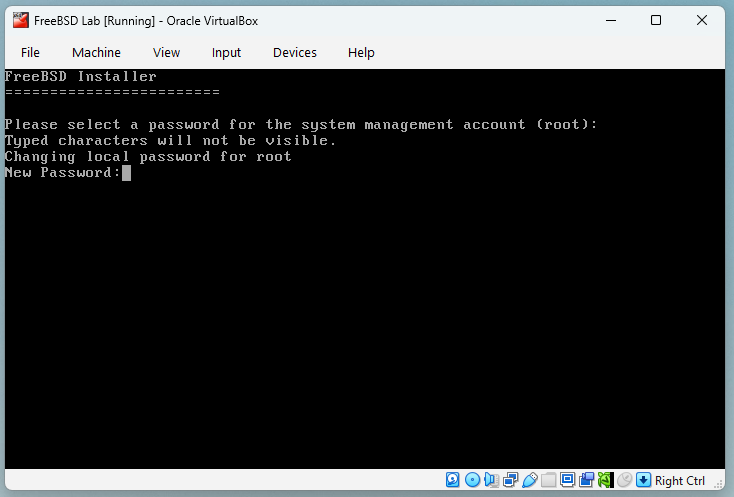
- Root Password: When the installer finish extracting the files, you will need to choose a password for your root access. Choose one that you will remember. Press Enter to continue.
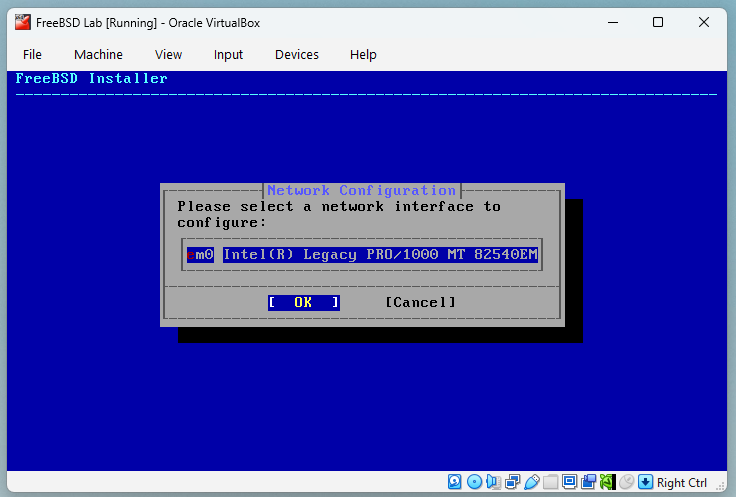
- Network Configuration: Choose the network interface (em0) that you want to use and press Enter to continue.
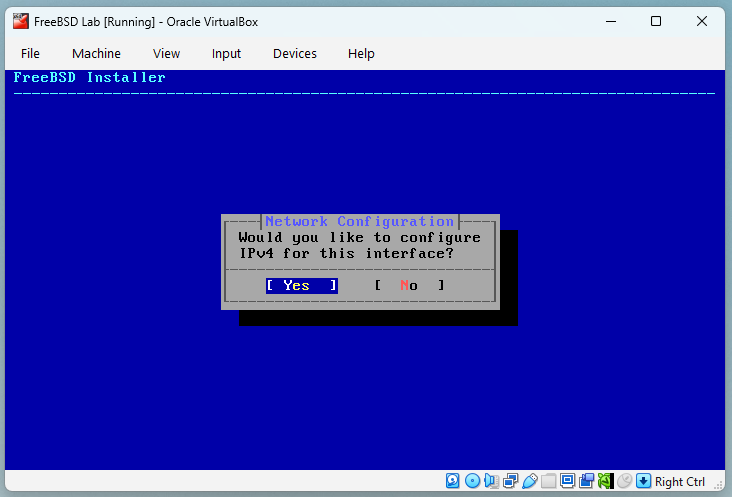
- Network Configuration: Choose [ Yes ] to enable IPv4 in your network interface and press Enter to continue.
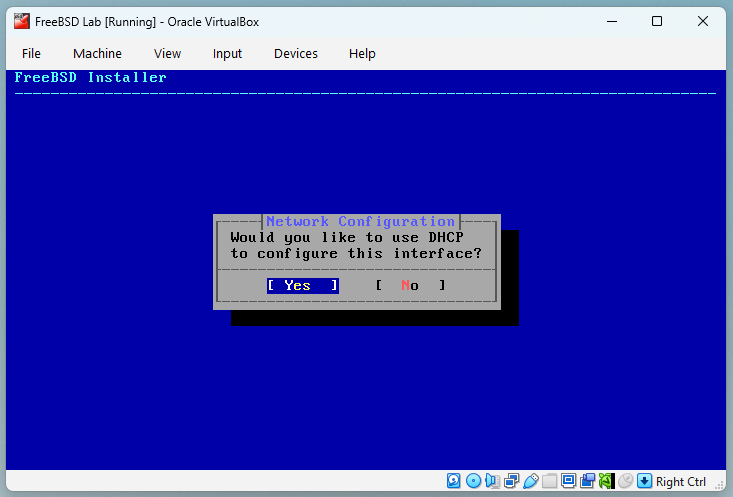
- Network Configuration: Choose [ Yes ] to enable DHCP in your network interface ,if you prefer to use a static IP address, choose [ No ]. Press Enter to continue.
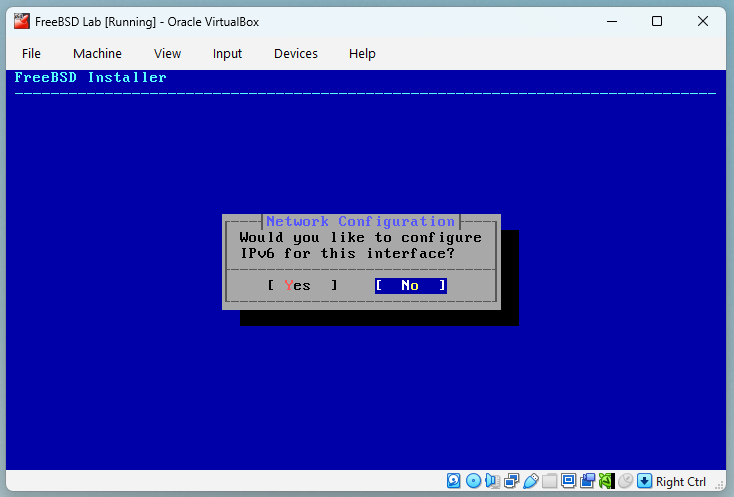
- Network Configuration: Choose [ No ] to disable IPv6 in your network interface and press Enter to continue.
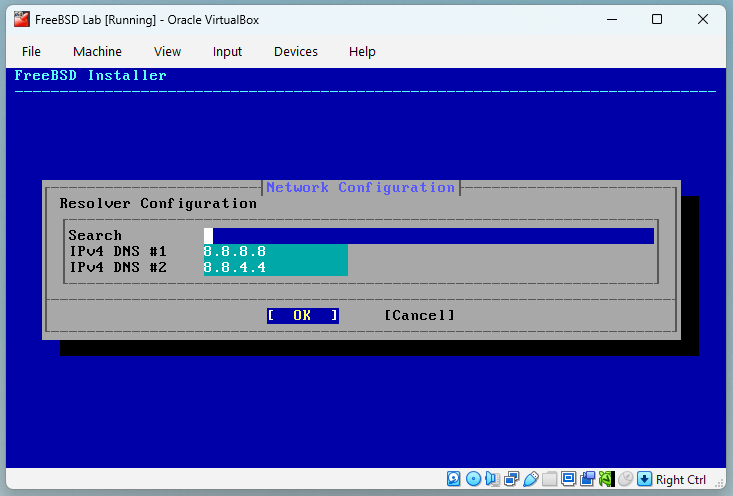
- Network Configuration: Type the IP Address of your preferred DNS servers, in the example I`m using the Google DNS. Press Enter to continue.
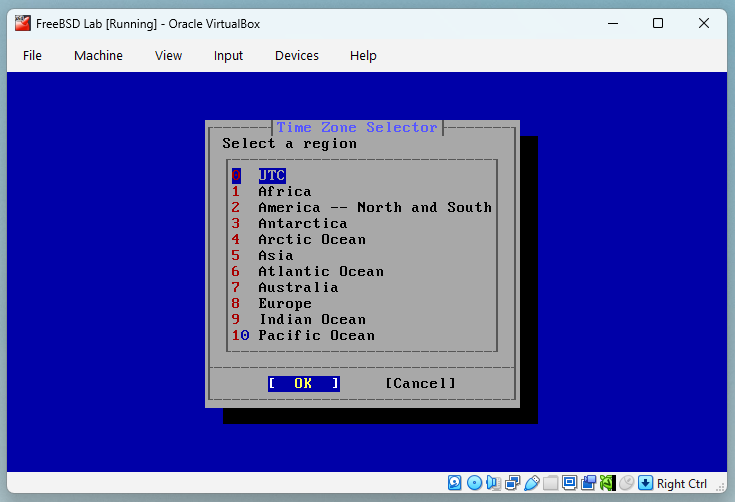
- Time Zone Selector: Choose the desired Time Zone for your FreeBSD System, for this example I`m using UTC. Press Enter to continue.
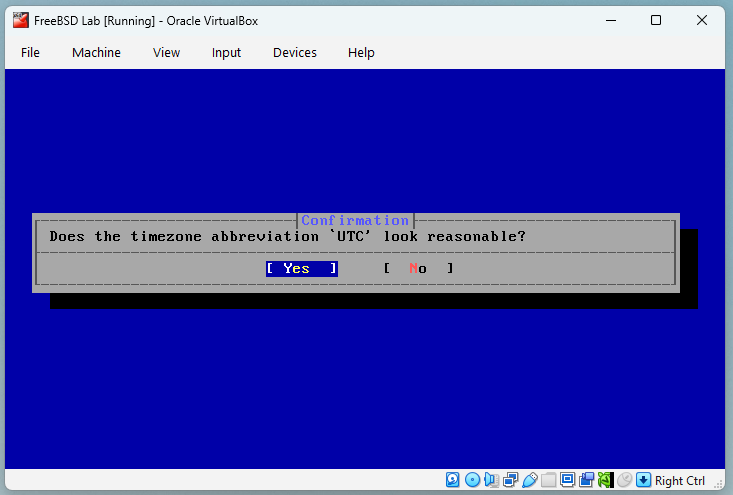
- Confirm Time Zoner: Confirm the Time Zone you want to use. Choose [ YES ] and press Enter to continue.
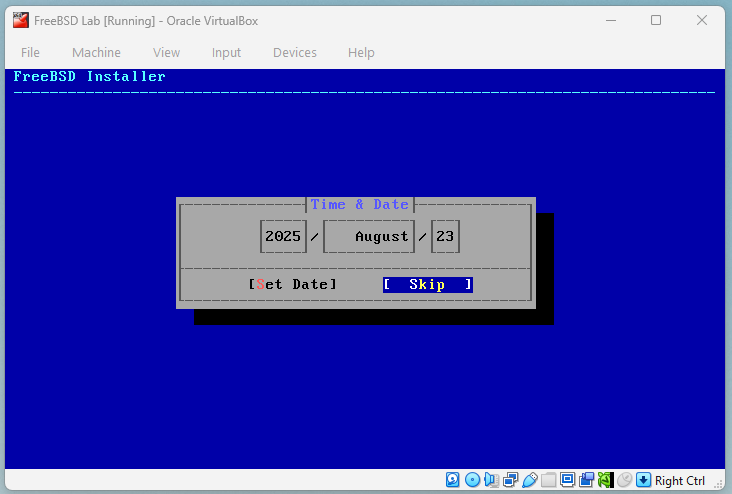
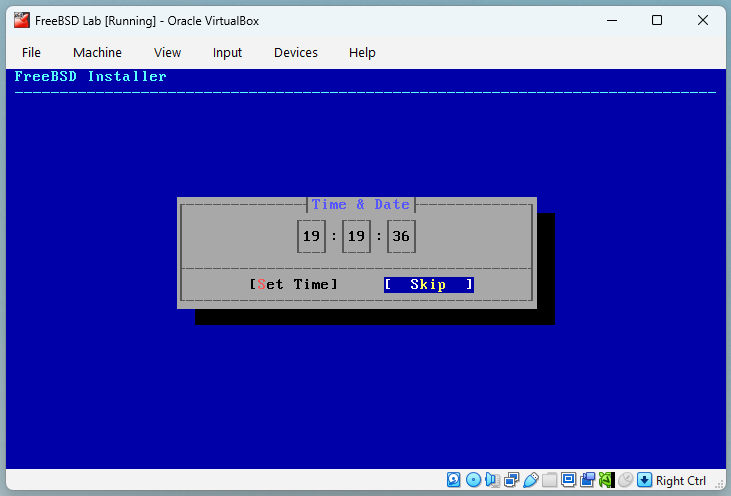
- Time & Date: The installer will give you the chance to adjust manually the Date and Time. Normally its safe to choose [ Skip ]. Press Enter to continue.
- System Configuration: The installer will give you the chance to choose some services to start at boot, select ntpd and press Enter to continue.

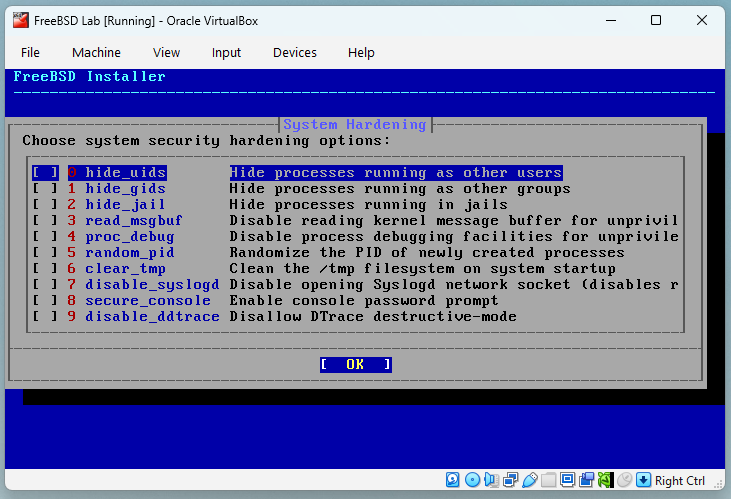
- System hardening: The installer will give you the chance to enable some security hardening to be applied at boot, accept the default for now and press Enter to continue.
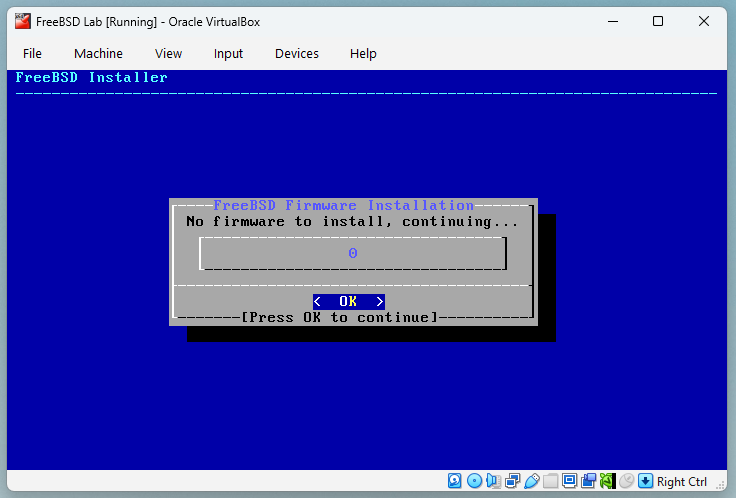
- Firmware Check: The installer will verify if your hardware components need any specific firmware to work properly and will install it if needed. Press Enter to continue.
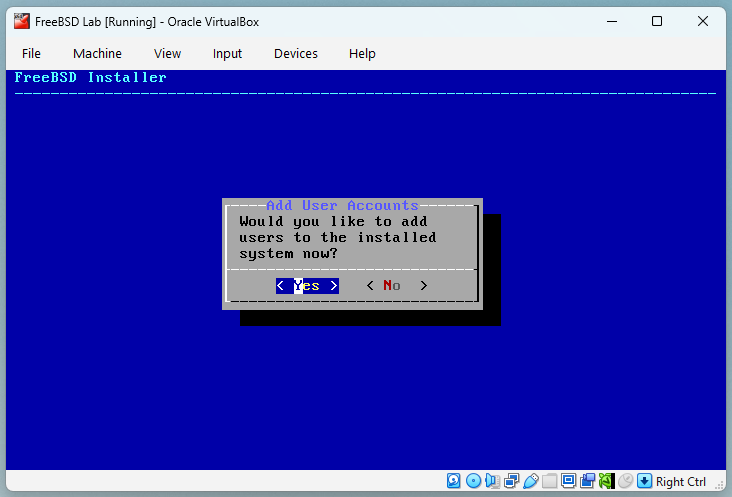
- Add User Accounts: The installer will give you the opportunity to add a normal user to your system. Choose [ Yes ] and press Enter to continue.
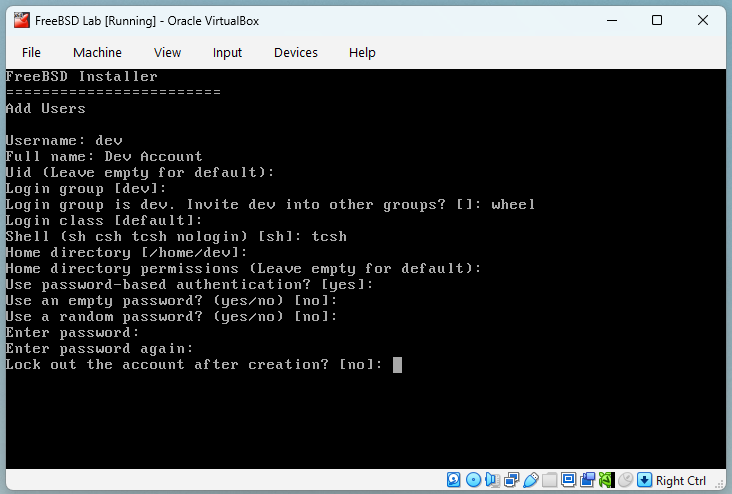
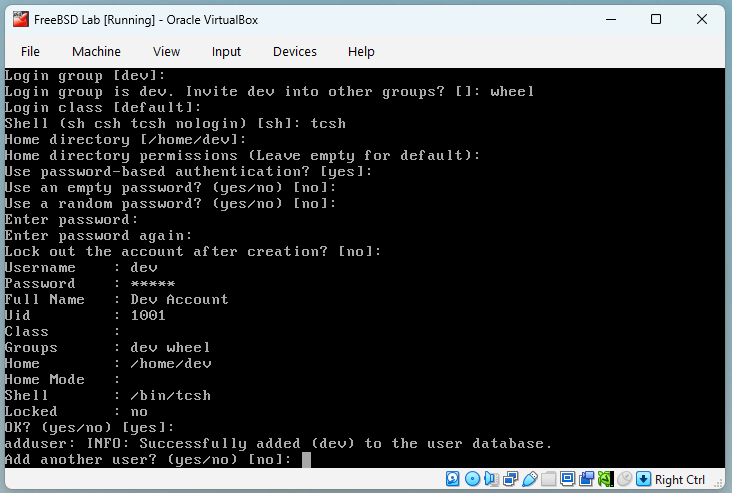
- Create a User: The installer will ask you to type the user information and to answer some basic questions, you should choose your desired username and password, you can accept the default answers for all questions except for the question "Invite USER into other groups?", to this question you need answer "wheel", this is the group in FreeBSD that will allow you to use the command
suto become root during a normal session.
- Create a User: After you have answered all questions and have created your user, the FreeBSD installer will ask if you want to add another user. Just press Enter to accept the default answer (no) to go to the Final Configuration menu.
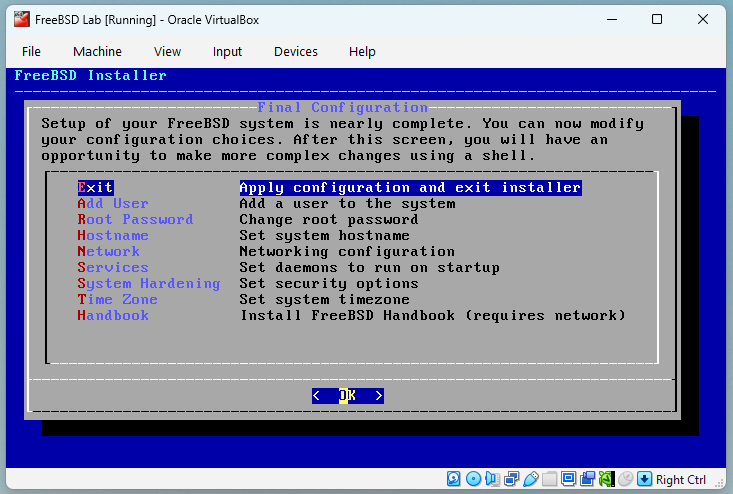
- Final Configuration: At this point you have already finished the FreeBSD installation. This final menu allow you to review and change the options that you have made in the previous steps. Select Exit to leave the installer and press Enter.
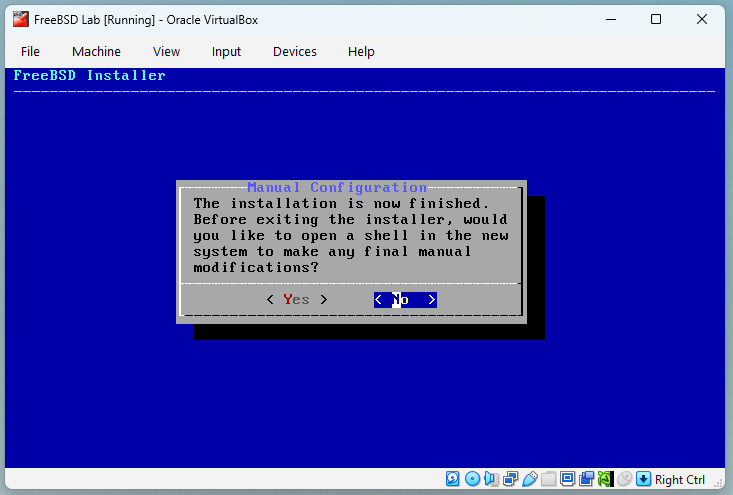
- Manual Configuration: The installer will ask you if you want to open a shell to do manual configurations in your fresh installed system. Choose [ No ] and press Enter.
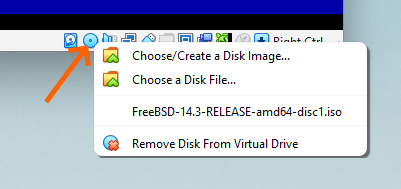
- Eject the Install Disc: Before we reboot the VM, we need to eject the virtual disc that we used for the installation. To do that, left click with your mouse in the CD/DVD icon in the lower status bar of your VirtualBox VM window, and right click in the menu "Remove Disk From Virtual Drive".
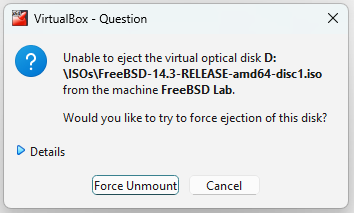
If for some reason you receive a message telling that the virtual optical disk is in use and can't be ejected, click in the button "Force Unmount", after that you can proceed to reboot.
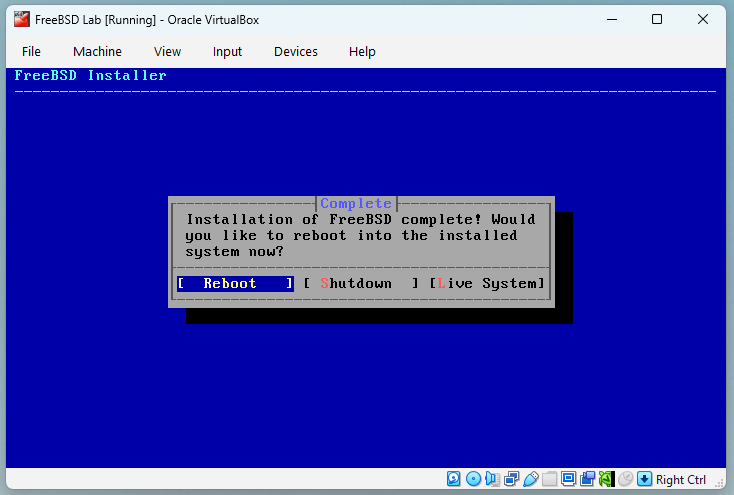
- Reboot your VM: Press Enter in this menu to reboot your FreeBSD VM.
Installing FreeBSD on Bare Metal
If you're using a spare PC or laptop, you'll need to install FreeBSD directly from a bootable USB flash drive. Here's how:
Step 1: Prepare a USB Stick
- You'll need a USB stick with at least 2 GB capacity.
- Make sure to back up any data on it; the process will erase everything.
Step 2: Download the Right Image
- For USB installs, download the memstick image (
FreeBSD-14.3-RELEASE-amd64-memstick.img).
Step 3: Create the Bootable USB (Windows Instructions)
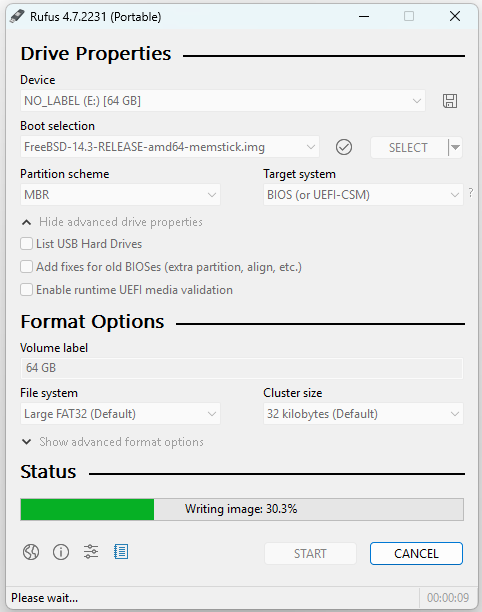
On Windows, the easiest tool is Rufus:
- Download Rufus from https://rufus.ie.
- Insert your USB stick.
- Open Rufus and select:
- Device: your USB stick.
- Boot selection: the FreeBSD memstick
.imgfile you downloaded. - Partition scheme: MBR
- Target System: BIOS (or UEFI-CSM)
- File system: leave default.
- Click Start. Rufus will warn you that all data will be destroyed, accept it.
- Wait until the process finishes. Your USB stick is now bootable.
If you already have a UNIX-like system, you can create the USB from the terminal using the dd command:
% sudo dd if=FreeBSD-14.3-RELEASE-amd64-memstick.img of=/dev/da0 bs=1M
Replace /dev/da0 with your USB device path.
Step 4: Boot from USB
- Insert the USB stick into your target machine.
- Enter the BIOS/UEFI boot menu (usually by pressing F12, Esc, or Del during startup).
- Select the USB drive as the boot device.
Step 5: Run the Installer
Once FreeBSD boots, follow the same installer steps described above, where we choose the Keyboard layout, Hostname, Distribution, etc.
After installation completes, remove the USB stick and reboot. FreeBSD will now boot from the hard drive.
First Boot
After installation, you'll see the FreeBSD boot menu:
Followed by the login prompt:
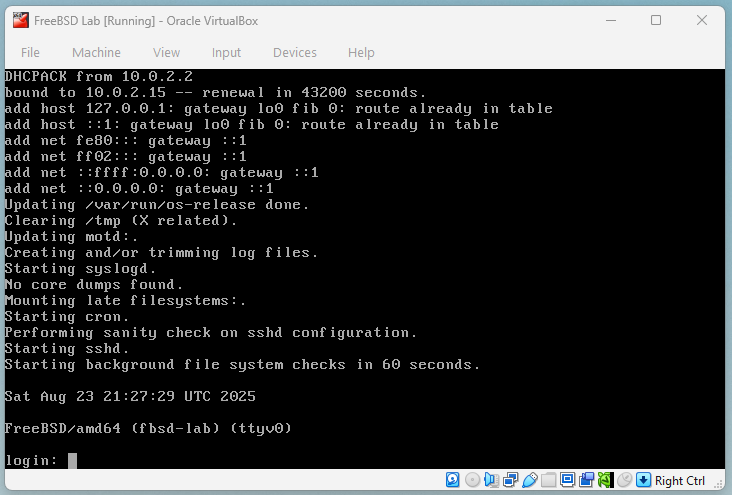
Congratulations! Your FreeBSD lab machine is now alive and ready for configuration.
Wrapping Up
You've just completed one of the most important milestones: installing FreeBSD 14.3 on your dedicated lab environment. Whether in a VM or on bare metal, you now have a clean system that you can safely break, fix, and rebuild as you learn.
In the next section, we'll walk through the initial configuration you should do right after installation: setting up networking, enabling essential services, and preparing the system for development work.
First Boot and Initial Configuration
When your FreeBSD system finishes its first reboot after installation, you're greeted with something that feels very different from Windows or macOS. There's no flashy desktop, no icons, no "getting started" wizard. Instead, you're dropped at a login prompt.
Don't worry, this is normal and intentional. FreeBSD is a UNIX-like system designed to be powerful, stable, and flexible, not flashy. The default environment is simple so that you, the administrator, are in full control. Think of this as the moment you've just unlocked the door to your workshop: the benches are empty, the tools aren't yet arranged, but the space is ready to be built into exactly what you need.
In this section, we'll perform the essential first steps to make your FreeBSD lab comfortable, secure, and ready for driver development.
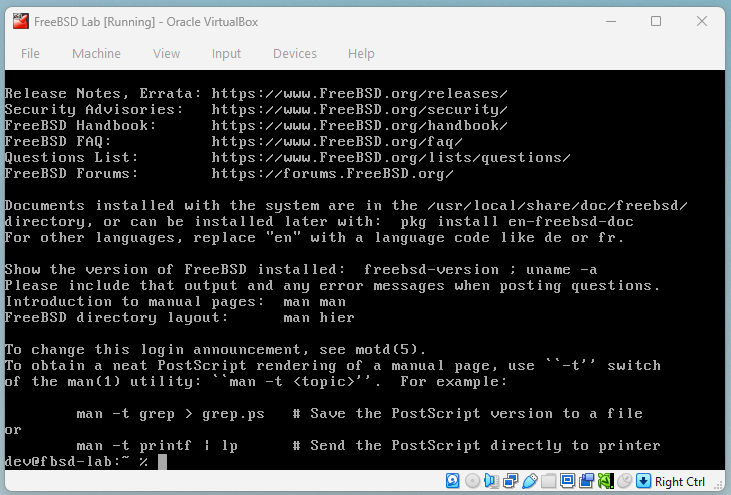
Logging In
At the login prompt:
- Enter the username you created during installation.
- Type your password (remember that UNIX systems do not display
*when typing passwords).
You're now inside FreeBSD as a regular user.
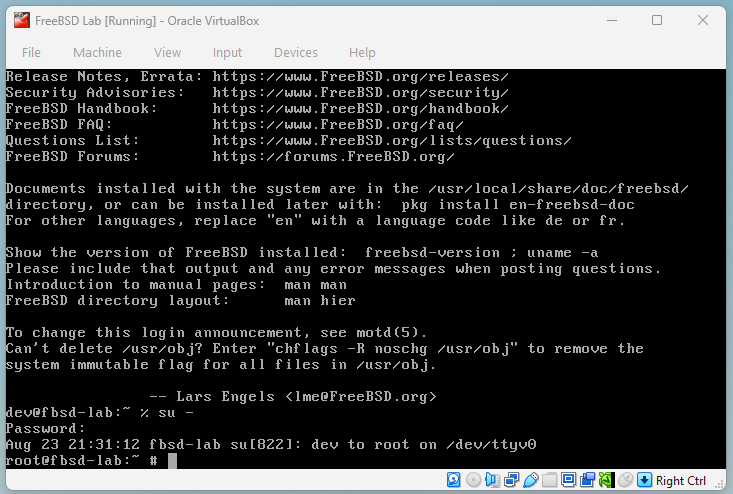
Switching to the Root User
Some tasks, like installing software or editing system files, require root privileges. You should avoid staying logged in as root all the time (it's too risky if you mistype a command), but it's good practice to temporarily switch to root when needed:
% su -
Password:
Enter the root password you set during installation. The prompt will change from % to #, which means you are now root.
Setting the Hostname and Time
Your system needs a name and correct time settings.
-
To check the hostname:
% hostnameIf you want to change it, edit
/etc/rc.conf:# ee /etc/rc.confAdd or adjust this line:
hostname="fbsd-lab" -
To synchronise time, make sure NTP is enabled (it usually is if you selected it during installation). You can test with:
% dateIf the time is wrong, correct it manually for now:
# date 202508231530(This sets date/time to 23 Aug 2025, 15:30 - format is
YYYYMMDDhhmm).
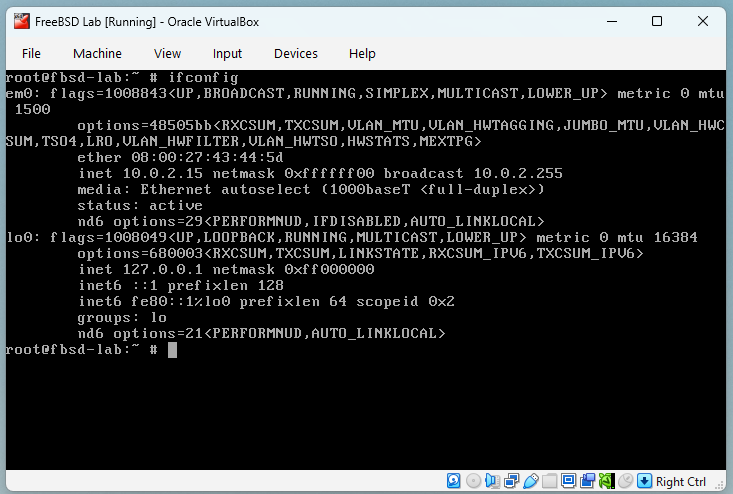
Networking Basics
Most installations with DHCP "just work." To verify:
% ifconfig
You should see an interface (like em0, re0, or vtnet0 in VMs) with an IP address. If you don't, you may need to enable DHCP in /etc/rc.conf:
ifconfig_em0="DHCP"
Replace em0 with your actual interface name from ifconfig.
Installing and Configuring sudo
As a best practice, you should use sudo instead of switching to root for every privileged command.
-
Install sudo:
# pkg install sudo -
Add your user to the
wheelgroup (if you haven't done that when you created it):# pw groupmod wheel -m yourusername -
Now, lets enable the group
wheelto usesudo.Execute the command
visudoand search for these lines in the file editor that will open:## ## User privilege specification ## root ALL=(ALL:ALL) ALL ## Uncomment to allow members of group wheel to execute any command # %wheel ALL=(ALL:ALL) ALL ## Same thing without a password #%wheel ALL=(ALL:ALL) NOPASSWD: ALL
Delete the # from the line #%wheel ALL=(ALL:ALL) NOPASSWD: ALL , place the cursor in the character you want to delete using your arrow keys and press x , to save the file and exit the editor pressing ESC and than type :wq and pressing Enter.
-
to verify that it is working as expected, log out and log back in, then run:
% sudo whoami
root
Now your user can safely perform admin tasks without staying logged in as root.
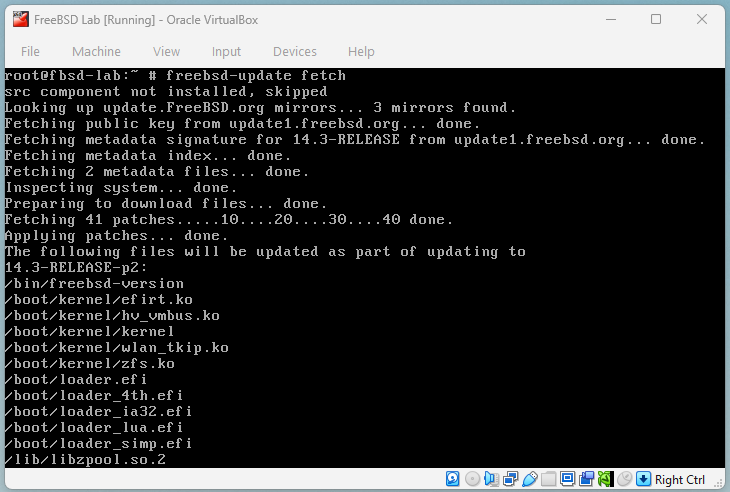
Updating the System
Before installing development tools, bring your system up to date:
# freebsd-update fetch install
# pkg update
# pkg upgrade
This ensures you're running the latest security patches.
Creating a Comfortable Environment
Even small tweaks make your daily work smoother:
-
Enable command history and completion (if using
tcsh, the default for users, this is already included). -
Edit
.cshrcin your home directory to add useful aliases:alias ll 'ls -lh' alias cls 'clear' -
Install a friendlier editor (optional):
# pkg install nano
Basic Hardening for Your Lab
Even though this is a lab environment, it's important to add a few layers of safety. This is especially true if you enable SSH, whether you're running FreeBSD inside a VM on your laptop or on a spare physical machine. Once SSH is on, your system accepts remote logins and that means you should take some precautions.
You have two simple approaches. Pick the one you prefer; both are fine for a lab.
Option A: Minimal pf rules (block everything inbound except SSH)
-
Enable
pfand create a small ruleset:# sysrc pf_enable="YES" # nano /etc/pf.confPut this in
/etc/pf.conf(replacevtnet0/em0with your interface):set skip on lo ext_if = "em0" # VM often uses vtnet0; on bare metal you may see em0/re0/igb0, etc. tcp_services = "{ ssh }" block in all pass out all keep state pass in on $ext_if proto tcp to (self) port $tcp_services keep state -
Start
pf(and it will persist across reboots):# service pf start
VM note: If your VM uses NAT, you may also need to configure port forwarding in your hypervisor (e.g., VirtualBox: Host Port 2222 -> Guest Port 22) and then SSH to localhost -p 2222. The pf rule above still applies inside the guest.
Option B: Use the built-in ipfw presets (very beginner-friendly)
-
Enable
ipfwwith theworkstationpreset and open SSH:# sysrc firewall_enable="YES" # sysrc firewall_type="workstation" # sysrc firewall_myservices="22/tcp" # sysrc firewall_logdeny="YES" # service ipfw startworkstationprovides a stateful ruleset that "protects this machine" and is easy to start with.firewall_myserviceslists inbound services you want to allow; here we allow SSH on TCP/22.- You can switch to other presets later (e.g.,
client,simple) as your needs evolve.
Tip: Choose either pf or ipfw, not both. For a first lab, the ipfw preset is the quickest path; the tiny pf ruleset is equally fine and very explicit.
Keep it patched
Run these regularly to stay current:
% sudo freebsd-update fetch install
% sudo pkg update && pkg upgrade
Why bother in a VM? Because a VM is still a real machine on your network. Good habits here prepare you for production later.
Wrapping Up
Your FreeBSD system is no longer a bare skeleton, it now has a hostname, working networking, an updated base system, and a user account with sudo access. You've also applied a small but meaningful layer of hardening: a simple firewall that still permits SSH, and regular updates. These are not just optional tweaks, they're the kind of habits that make you a responsible systems developer.
In the next section, we'll install the development tools needed for driver programming, including compilers, debuggers, editors, and the FreeBSD source tree itself. This is where your lab transforms from a blank canvas into a real development workstation.
Preparing the System for Development
Now that your FreeBSD lab is installed, updated, and lightly hardened, it's time to turn it into a proper driver development environment. Think of this step as stocking your workshop with the right tools; compiler, debugger, version control, and the FreeBSD source tree. Without these, you won't be able to build or test the code we'll write in later chapters.
The good news is that FreeBSD already includes most of what we need. In this section, we'll install the missing pieces, verify everything works, and run a tiny "hello module" test to prove that your lab is ready for driver development.
Installing Development Tools
FreeBSD comes with Clang/LLVM in the base system. To confirm:
% cc --version
FreeBSD clang version 19.1.7 (...)
If you see a version string like the above, you're ready to compile C code.
Still, you'll need some additional tools:
# pkg install git gmake gdb
git: version control system.gmake: GNU make (some projects require it in addition to FreeBSD's ownmake).gdb: the GNU debugger.
Choosing an Editor
Every developer has their favourite editor. FreeBSD includes vi by default, powerful, but with a steep learning curve. If you're brand new, you can safely start with ee (Easy Editor), which guides you with on-screen help, or install nano, which has simpler shortcuts like Ctrl+O to save and Ctrl+X to quit:
% sudo pkg install nano
But sooner or later, you'll want to learn vim, the improved version of vi. It's fast, highly configurable, and widely used in FreeBSD development. One of its big advantages is syntax highlighting, which makes C code much easier to read.
Configuring Vim for Syntax Highlighting
-
Install vim:
# pkg install vim -
Create a configuration file in your home directory:
% ee ~/.vimrc -
Add these lines:
syntax on
set number
set tabstop=8
set shiftwidth=8
set expandtab
set autoindent
set background=dark
syntax on-> enables syntax highlighting.set number-> shows line numbers.- The tab/indent settings follow FreeBSD coding style (8-space tabs, not 4).
set background=dark-> makes colours readable on a dark terminal.
-
Save the file and open a C program:
% vim hello.cYou should now see coloured keywords, strings, and comments.
Nano Syntax Highlighting
If you prefer nano, it also supports syntax highlighting. The configuration is stored in /usr/local/share/nano/. To enable it for C:
% cp /usr/local/share/nano/c.nanorc ~/.nanorc
Now open a .c file with nano and you'll see basic highlighting.
Easy Editor (ee)
ee is the simplest option, no highlighting, just plain text. It's safe for beginners and great for editing configuration files quickly, but you'll probably outgrow it for driver development.
Accessing Documentation
The man pages are your built-in reference library. Try this:
% man 9 malloc
This brings up the manual page for the malloc(9) kernel function. The (9) section number indicates it's part of the kernel interfaces, which is where we'll spend most of our time later.
Other useful commands:
man 1 ls-> user command documentation.man 5 rc.conf-> configuration file format.man 9 intro-> overview of kernel programming interfaces.
Installing the FreeBSD Source Tree
Most driver development requires access to the FreeBSD kernel source code. You'll store it in /usr/src.
Clone it with Git:
% sudo git clone --branch releng/14.3 --depth 1 https://git.FreeBSD.org/src.git src /usr/src
This will take a few minutes and download several gigabytes. When finished, you'll have the full kernel source tree available.
Verify with:
% ls /usr/src/sys
You should see directories like dev, kern, net, and vm. These are where the FreeBSD kernel lives.
Warning: Match your headers to your running kernel.
FreeBSD is very strict about building loadable kernel modules against the exact header set that matches the kernel you are running. If your kernel was built from 14.3-RELEASE but /usr/src points to a different branch or version, you can hit confusing compile or load errors. To avoid trouble in the exercises presented in this book, please make sure you have the FreeBSD 14.3 source tree installed in /usr/src and that it matches your running kernel. A quick check is freebsd-version -k which should print 14.3-RELEASE, and your /usr/src should be on the releng/14.3 branch as instructed above.
Tip: if /usr/src already exists and points elsewhere, you can retarget it:
% sudo git -C /usr/src fetch --all --tags
% sudo git -C /usr/src checkout releng/14.3
% sudo git -C /usr/src pull --ff-only
With the kernel and headers aligned, your example module will build and load reliably.
Testing Your Toolkit: A "Hello Kernel Module"
To confirm that everything works, let's compile and load a tiny kernel module. This is not yet a driver, but it proves your lab can build and interact with the kernel.
- Create a file called
hello_world.c:
/*
 * hello_world.c - Simple FreeBSD kernel module
 * Prints messages when loaded and unloaded
 */

#include <sys/param.h>
#include <sys/kernel.h>
#include <sys/module.h>
#include <sys/systm.h>

/*
 * Load handler - called when the module is loaded
 */
static int
hello_world_load(module_t mod, int cmd, void *arg)
{
    int error = 0;

    switch (cmd) {
    case MOD_LOAD:
        printf("Hello World! Kernel module loaded.\n");
        break;
    case MOD_UNLOAD:
        printf("Goodbye World! Kernel module unloaded.\n");
        break;
    default:
        error = EOPNOTSUPP;
        break;
    }

    return (error);
}

/*
 * Module declaration
 */
static moduledata_t hello_world_mod = {
    "hello_world",      /* module name */
    hello_world_load,   /* event handler */
    NULL                /* extra data */
};

/*
 * Register the module with the kernel
 * DECLARE_MODULE(name, data, sub-system, order)
 */
DECLARE_MODULE(hello_world, hello_world_mod, SI_SUB_DRIVERS, SI_ORDER_MIDDLE);
MODULE_VERSION(hello_world, 1);
- Create a
Makefile:
# Makefile for hello_world kernel module

KMOD=   hello_world
SRCS=   hello_world.c

.include <bsd.kmod.mk>
- Build the module:
# make
This should create a file hello.ko.
- Load the module:
# kldload ./hello_world.ko
Check the message in the system log:
% dmesg | tail -n 5
You should see:
Hello World! Kernel module loaded..
- Unload the module:
# kldunload hello_world.ko
Check again:
% dmesg | tail -n 5
You should see:
Goodbye World! Kernel module unloaded.
Hands-On Lab: Verifying Your Development Setup
- Install
git,gmake, andgdb. - Verify Clang is working with
% cc --version. - Install and configure
vimwith syntax highlighting, or set upnanoif you prefer. - Clone the FreeBSD 14.3 source tree to
/usr/src. - Write, compile, and load the
hello_worldkernel module. - Record the results (did you see the "Hello, kernel world!" message?) in your lab logbook.
Wrapping Up
You've now stocked your FreeBSD workshop with the essential tools: compiler, debugger, version control, documentation, and the kernel source itself. You've even built and loaded your very first kernel module, proving your setup works end-to-end.
In the next section, we'll look at using snapshots and backups so that you can experiment freely without fear of losing your progress. This will give you the confidence to take bigger risks and recover quickly when things break.
Using Snapshots and Backups
One of the biggest advantages of setting up a lab environment is that you can experiment without fear. When you're writing kernel code, mistakes are inevitable: a wrong pointer, an infinite loop, or a bad unload routine can crash the entire operating system. Instead of worrying, you can treat crashes as part of the learning process, if you have a way to recover quickly.
That's where snapshots and backups come in. Snapshots let you "freeze" your FreeBSD lab at a safe point, then roll back instantly if something goes wrong. Backups protect your important files, like your code or lab notes, in case you need to reinstall the system.
In this section, we'll explore both.
Snapshots in Virtual Machines
If you're running FreeBSD in a VM (VirtualBox, VMware, bhyve), you have a huge safety net: snapshots.
- In VirtualBox or VMware, snapshots are managed from the GUI, you can save, restore, and delete them with a few clicks.
- In bhyve, snapshots are managed through the storage backend, usually ZFS. You snapshot the dataset that holds the VM's disk image and roll it back when needed.
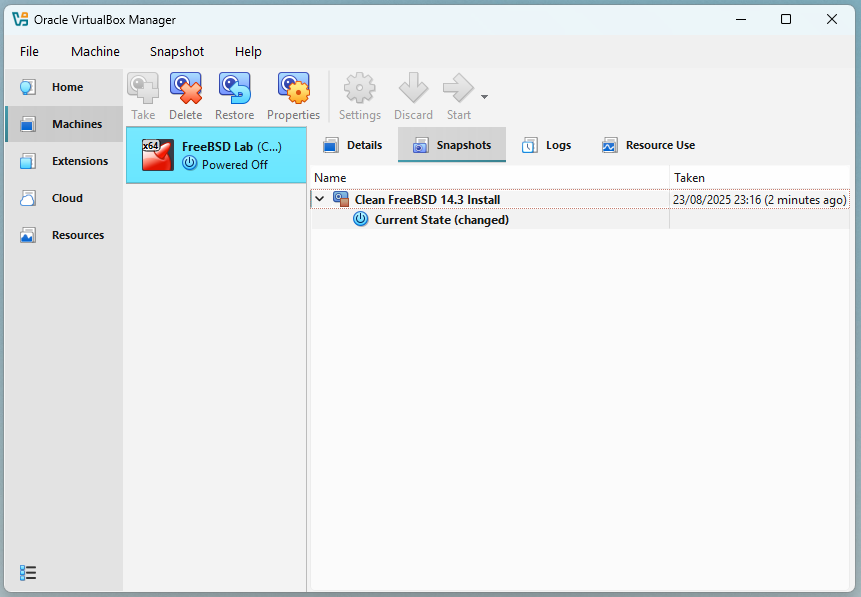
Example workflow for VirtualBox
-
Shut down your FreeBSD VM after finishing initial setup.
-
In the VirtualBox Manager, select your VM -> Snapshots -> click Take.
-
Name it:
Clean FreeBSD 14.3 Install.
-
Later, before testing risky kernel code, take another snapshot:
Before Hello Driver.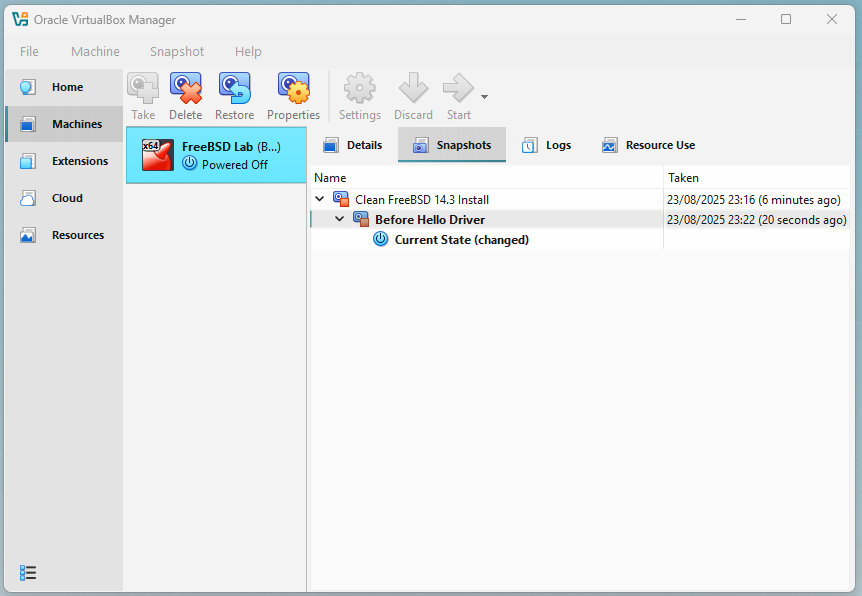
-
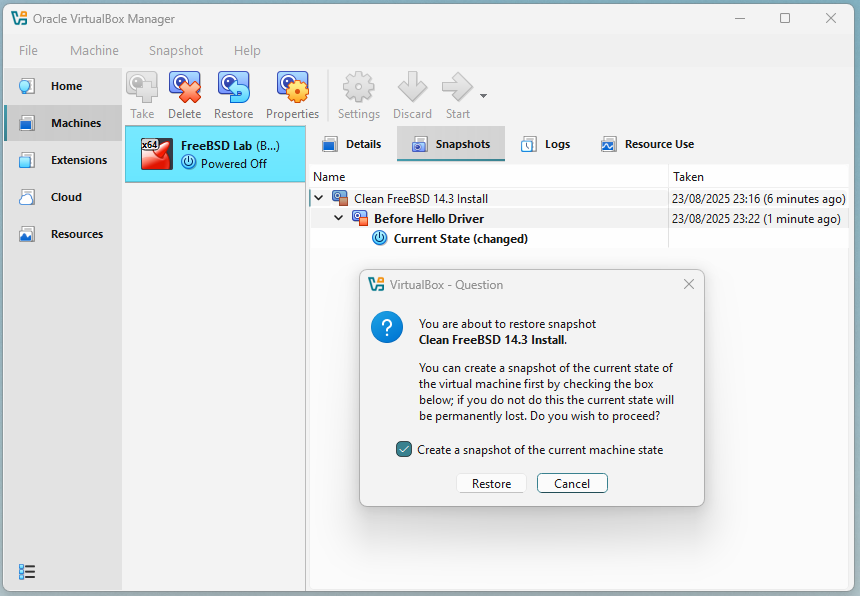
If the system crashes or you break networking, just restore the snapshot.
Example Workflow in bhyve (with ZFS)
If your VM disk is stored on a ZFS dataset, for example /zroot/vm/freebsd.img:
-
Create a snapshot before experiments:
# zfs snapshot zroot/vm@clean-install -
Make changes, test code, or even crash the kernel.
-
Roll back instantly:
# zfs rollback zroot/vm@clean-install
Snapshots on Bare Metal
If you're running FreeBSD directly on hardware, you don't have the luxury of GUI snapshots. But if you installed FreeBSD with ZFS, you still have access to the same powerful snapshot tools.
With ZFS:
# zfs snapshot -r zroot@clean-install
-
This creates a snapshot of your root filesystem.
-
If something goes wrong, you can roll back:
# zfs rollback -r zroot@clean-install
ZFS snapshots are instantaneous and don't duplicate data, they only track changes. For serious bare-metal labs, ZFS is highly recommended.
If you installed with UFS instead of ZFS, you won't have snapshots. In that case, rely on backups (see below) and perhaps consider reinstalling with ZFS later if you want this safety net.
Backing Up Your Work
Snapshots protect the system state, but you also need to protect your work, your driver code, notes, and Git repositories.
Simple strategies:
-
Git: If you're using Git (and you should), push your code to a remote service like GitHub or GitLab. This is the best backup.
-
Tarballs: Create an archive of your project:
% tar czf mydriver-backup.tar.gz mydriver/ -
Copy to host: If using a VM, copy files from guest to host (VirtualBox shared folders, or
scpover SSH).
Note: Think of your VM as disposable, but your code is precious. Always back it up before testing dangerous changes.
Hands-On Lab: Breaking and Fixing
-
If you're in VirtualBox/VMware:
- Create a snapshot named
Before Break. - As root, run something harmless but destructive (e.g., delete
/tmp/*). - Restore the snapshot and confirm
/tmpis back to normal.
- Create a snapshot named
-
If you're in bhyve with ZFS-backed storage:
- Snapshot your VM dataset.
- Delete a test file inside the guest.
- Roll back the ZFS snapshot.
-
If you're on bare metal with ZFS:
- Take a snapshot
zroot@before-break. - Delete a test file.
- Roll back with
zfs rollbackand confirm the file is restored.
- Take a snapshot
-
Back up your
hello_worldkernel module source with:% tar czf hello-backup.tar.gz hello_world/
Record in your lab logbook: which method you used, how long it took, and how confident you feel now about experimenting.
Wrapping Up
By learning to use snapshots and backups, you've added one of the most important safety nets to your lab. Now you can crash, break, or misconfigure FreeBSD and recover in minutes. This freedom is what makes a lab so powerful, it lets you focus on learning, not on being afraid of mistakes.
In the next section, we'll set up version control with Git so you can track your progress, manage your experiments, and share your drivers.
Setting Up Version Control
Up to now, you've prepared your FreeBSD lab, installed the tools, and even built your first kernel module. But imagine this: you make a change to your driver, test it, and suddenly nothing works. You wish you could go back to the last working version. Or maybe you want to keep two different experiments without mixing them up.
This is exactly why developers use version control systems, tools that record the history of your work, allow you to roll back to previous states, and make it easy to share code with others. In the FreeBSD world (and in most open-source projects), the standard is Git.
In this section, you'll learn how to use Git to manage your drivers from day one.
Why Version Control Matters
- Track your changes: Every experiment, every fix, every mistake is saved.
- Undo safely: If your code stops working, you can roll back to a known good version.
- Organize experiments: You can work on new ideas in "branches" without breaking your main code.
- Share your work: If you want feedback from others or publish your drivers, Git makes it easy.
- Professional habit: Every serious software project (including FreeBSD itself) uses version control.
Think of Git as the lab notebook for your code, only smarter: it not only records what you did, but can also restore your code to any past point in time.
Installing Git
If you haven't already installed Git in section 2.5, do it now:
# pkg install git
Check the version:
% git --version
git version 2.45.2
Configuring Git (Your Identity)
Before using Git, configure your identity so your commits are labeled correctly:
% git config --global user.name "Your Name"
% git config --global user.email "you@example.com"
This doesn't need to be your real name or email if you're just experimenting locally, but if you ever share code publicly, it helps to use something consistent.
You can check your settings with:
% git config --list
Creating Your First Repository
Let's put your hello_world kernel module under version control.
-
Navigate to the directory where you created
hello_world.cand theMakefile. -
Initialize a Git repository:
% git initThis creates a hidden
.gitdirectory where Git stores its history. -
Add your files:
% git add hello_world.c Makefile -
Make your first commit:
% git commit -m "Initial commit: hello_world kernel module" -
Check the history:
% git logYou should see your commit listed.
Best Practices for Commits
-
Write clear commit messages: Describe what changed and why.
- Bad:
fix stuff - Good:
Fix null pointer dereference in hello_loader()
- Bad:
-
Commit often: Small commits are easier to understand and roll back.
-
Keep experiments separate: If you try a new idea, make a branch:
% git checkout -b experiment-null-fix
Even if you never share your code, these habits will help you debug and learn faster.
Using Remote Repositories (Optional)
For now, you can keep everything local. But if you want to sync your code between machines or share it publicly, you can push it to a remote service like GitHub or GitLab.
Basic workflow:
% git remote add origin git@github.com:yourname/mydriver.git
% git push -u origin main
This is optional in the lab, but very useful if you want to back up your work in the cloud.
Hands-On Lab: Version Control for Your Driver
-
Initialize a Git repository in your
hellomodule directory. -
Make your first commit.
-
Edit
hello_world.c(e.g., change the message text). -
Run:
% git diffto see exactly what changed.
-
Commit the change with a clear message.
-
Record in your lab logbook:
- How many commits you made.
- What each commit did.
- How you would roll back if something broke.
Wrapping Up
You've now taken the first steps with Git, one of the most important tools in your developer toolkit. From now on, every driver you write in this book should live in its own Git repository. This way, you'll never lose your progress, and you'll always have a record of your experiments.
In the next section, we'll discuss documenting your work another key habit of professional developers. A well-written README or commit message can be the difference between code you understand a year later and code you have to rewrite from scratch.
Documenting Your Work
Software development isn't just about writing code it's also about making sure that you (and sometimes others) can understand that code later. When working on FreeBSD drivers, you'll often come back to a project weeks or months later and ask yourself: "Why did I write this? What was I testing? What did I change?"
Without documentation, you'll waste hours rediscovering your own thought process. With good notes, you can pick up exactly where you left off.
Think of documentation as the memory of your lab. Just like scientists keep detailed lab notebooks, developers should keep clear notes, READMEs, and commit messages.
Why Documentation Matters
- Future you will thank you: The details that seem obvious today will be forgotten in a month.
- Debugging becomes easier: When something breaks, notes help you understand what changed.
- Sharing is smoother: If you publish your driver, others can learn from your README.
- Professional habit: FreeBSD itself is famous for its high-quality documentation, following this tradition makes your work fit naturally into the ecosystem.
Writing a Simple README
Every project should start with a README.md file. At a minimum, include:
-
Project name:
Hello Kernel Module -
Description:
A simple "Hello, kernel world!" module for FreeBSD 14.3. -
How to build:
% make -
How to load/unload:
# kldload ./hello_world.ko # kldunload hello_world -
Notes:
This was created as part of my driver development lab, Chapter 2.
Using Commit Messages as Documentation
Git commit messages are a form of documentation. Together, they tell the story of your project. Follow these tips:
- Write commit messages in the present tense ("Add feature", not "Added feature").
- Make the first line short (50 characters or less).
- If needed, add a blank line and then a longer explanation.
Example:
Fix panic when unloading hello module

The handler did not check for NULL before freeing resources,
causing a panic when unloading. Added a guard condition.
Keeping a Lab Logbook
In Section 2.1, we suggested starting a lab logbook. Now is a good time to make it a habit. Keep a text file (for example, LABLOG.md) in the root of your Git repository. Each time you try something new, add a short entry:
2025-08-23
- Built hello module successfully.
- Confirmed "Hello, kernel world!" appears in dmesg.
- Tried unloading/reloading multiple times, no errors.
- Next step: experiment with passing parameters to the module.
This log doesn't need to be polished, it's just for you. Later, when debugging, these notes can be invaluable.
Tools to Help
- Markdown: Both README and lab logs can be written in Markdown (
.md), which is easy to read in plain text and nicely formatted on GitHub/GitLab. - man pages: Always note which man pages you used (e.g.,
man 9 module). This will remind you of your sources. - Screenshots/Logs: If you're using a VM, take screenshots of important steps, or save command outputs into files with redirection (
dmesg > dmesg.log).
Hands-On Lab: Documenting Your First Module
-
In your
hello_worldmodule directory, create aREADME.mddescribing what it does, how to build it, and how to load/unload it. -
Add your
README.mdto Git and commit it:% git add README.md % git commit -m "Add README for hello_world module" -
Start a
LABLOG.mdfile and record today's activities. -
Review your Git history with:
% git log --onelineto see how your commits tell the story of your project.
Wrapping Up
You've now learned how to document your FreeBSD driver experiments so that you never lose track of what you did or why. With a README, meaningful commit messages, and a lab logbook, you're building habits that will make you a more professional and efficient developer.
In the next section, we'll wrap up this chapter, reviewing everything you've built: a safe FreeBSD lab with the right tools, backups, version control, and documentation, all ready for the deeper journey into FreeBSD itself in Chapter 3.
Bringing It All Together
Congratulations! You've built your FreeBSD lab!
In this chapter, you:
- Understood why a safe lab environment is critical for driver development.
- Chose the right setup for your situation, a virtual machine or bare metal.
- Installed FreeBSD 14.3 step by step.
- Performed the initial configuration, including networking, users, and basic hardening.
- Installed the essential development tools: compiler, debugger, Git, and editors.
- Set up syntax highlighting in your editor, making C code easier to read.
- Cloned the FreeBSD 14.3 source tree to
/usr/src. - Compiled and tested your very first kernel module.
- Learned how to use snapshots and backups to recover quickly from mistakes.
- Started using Git for version control and added a README and lab logbook to document your work.
That's an impressive amount of progress for one chapter. You now have a complete workshop: a FreeBSD system where you can write, build, test, break, and recover as much as you need.
The most important takeaway is not just the tools you installed, but the mindset:
- Expect mistakes.
- Record your process.
- Use snapshots, backups, and Git to recover and learn.
Exercises
- Snapshots
- Take a snapshot of your VM or a ZFS snapshot on bare metal.
- Deliberately make a change (e.g., remove
/tmp/testfile). - Roll back and verify the system is restored.
- Version Control
- Make a small edit to your
hello_world.ckernel module. - Commit the change with Git.
- Use
git logandgit diffto review your history.
- Make a small edit to your
- Documentation
- Add a new entry to your
LABLOG.mddescribing today's work. - Update your
README.mdwith one new note (for example, mention theuname -aoutput).
- Add a new entry to your
- Reflection
- In your lab logbook, answer: What are the three most important safety nets I set up in Chapter 2?
Looking Ahead
In the next chapter, we'll step inside your new FreeBSD lab and explore how to use the system itself. You'll learn the basics of UNIX commands, navigation, and file management. These skills will make you comfortable living inside FreeBSD, preparing you for the more advanced topics to come.
Your lab is ready. Now it's time to learn how to work in it.